


The Essentials of Pickles
Quick Pickled Vegetables
The basics of how to make at-home pickles to extend the life of your favorite veggies.
Note: This post is all about simple, quick pickles and does not get into bulk prepping and canning. No specialized equipment required!

The fun part? You get to tailor the flavors to your tastes. Extra garlicky. Pinch of red pepper. Coriander. Want some onions in your pickles? Do it!
Pickling
Though many tend to pickle in the height of summer while fresh veggie harvests are in full swing, you can easily make pickled vegetables any time of the year. They make a perfect addition to top burgers, hot dogs, nachos, tacos, even dinner bowls. This post will walk you through the key steps and a basic method for creating pickling brine. From there, have fun and pickle away!
The Key Components
Vegetables. We all know pickled cucumbers but there are many vegetables that pickle well. Beets, cauliflower, carrots, onions, asparagus, and zucchini are all prime candidates. And you can, of course, combine them to make pickled toppings or relish like the classic Italian Giardiniera (a pickled relish made typically from bell peppers, celery, carrots, cauliflower and gherkin cucumbers). Whatever you choose to use, wash the veggies in cool water and chop into bite size pieces or long spears.
Brine. The brine is the star of the show! Not only does it do the most important work by preserving and flavoring the veggies, it also magically softens yet crisps them. A basic brine is made from white vinegar, water, salt, and dried seasonings. See below for a starter recipe, you’ll want to keep the vinegar/water/salt proportions the same to ensure preservation though you can vary the vinegars and spices.
Add-Ins. This is where the fun comes in! Additions to the brine add depth of flavor to your pickles. You can go sweet and spicy with cinnamon sticks or cloves or lean into heat with dried chilies and peeled garlic. See more ideas below.
Jars. Pickling works best in glass jars. You can find Mason jars at hardware stores, grocery stores or even in Walmart (and, of course, you can buy on Amazon). The easiest kind to use are those with a wide mouth and screw on lid. You may be able to find pickle jars with hinged lids at a store like Home Goods or a specialty kitchen shop. A good glass jar should be affordable and last you a life time. Though you should be careful with using them in the freezer, they work for just about every type of food storage and are dishwasher safe.
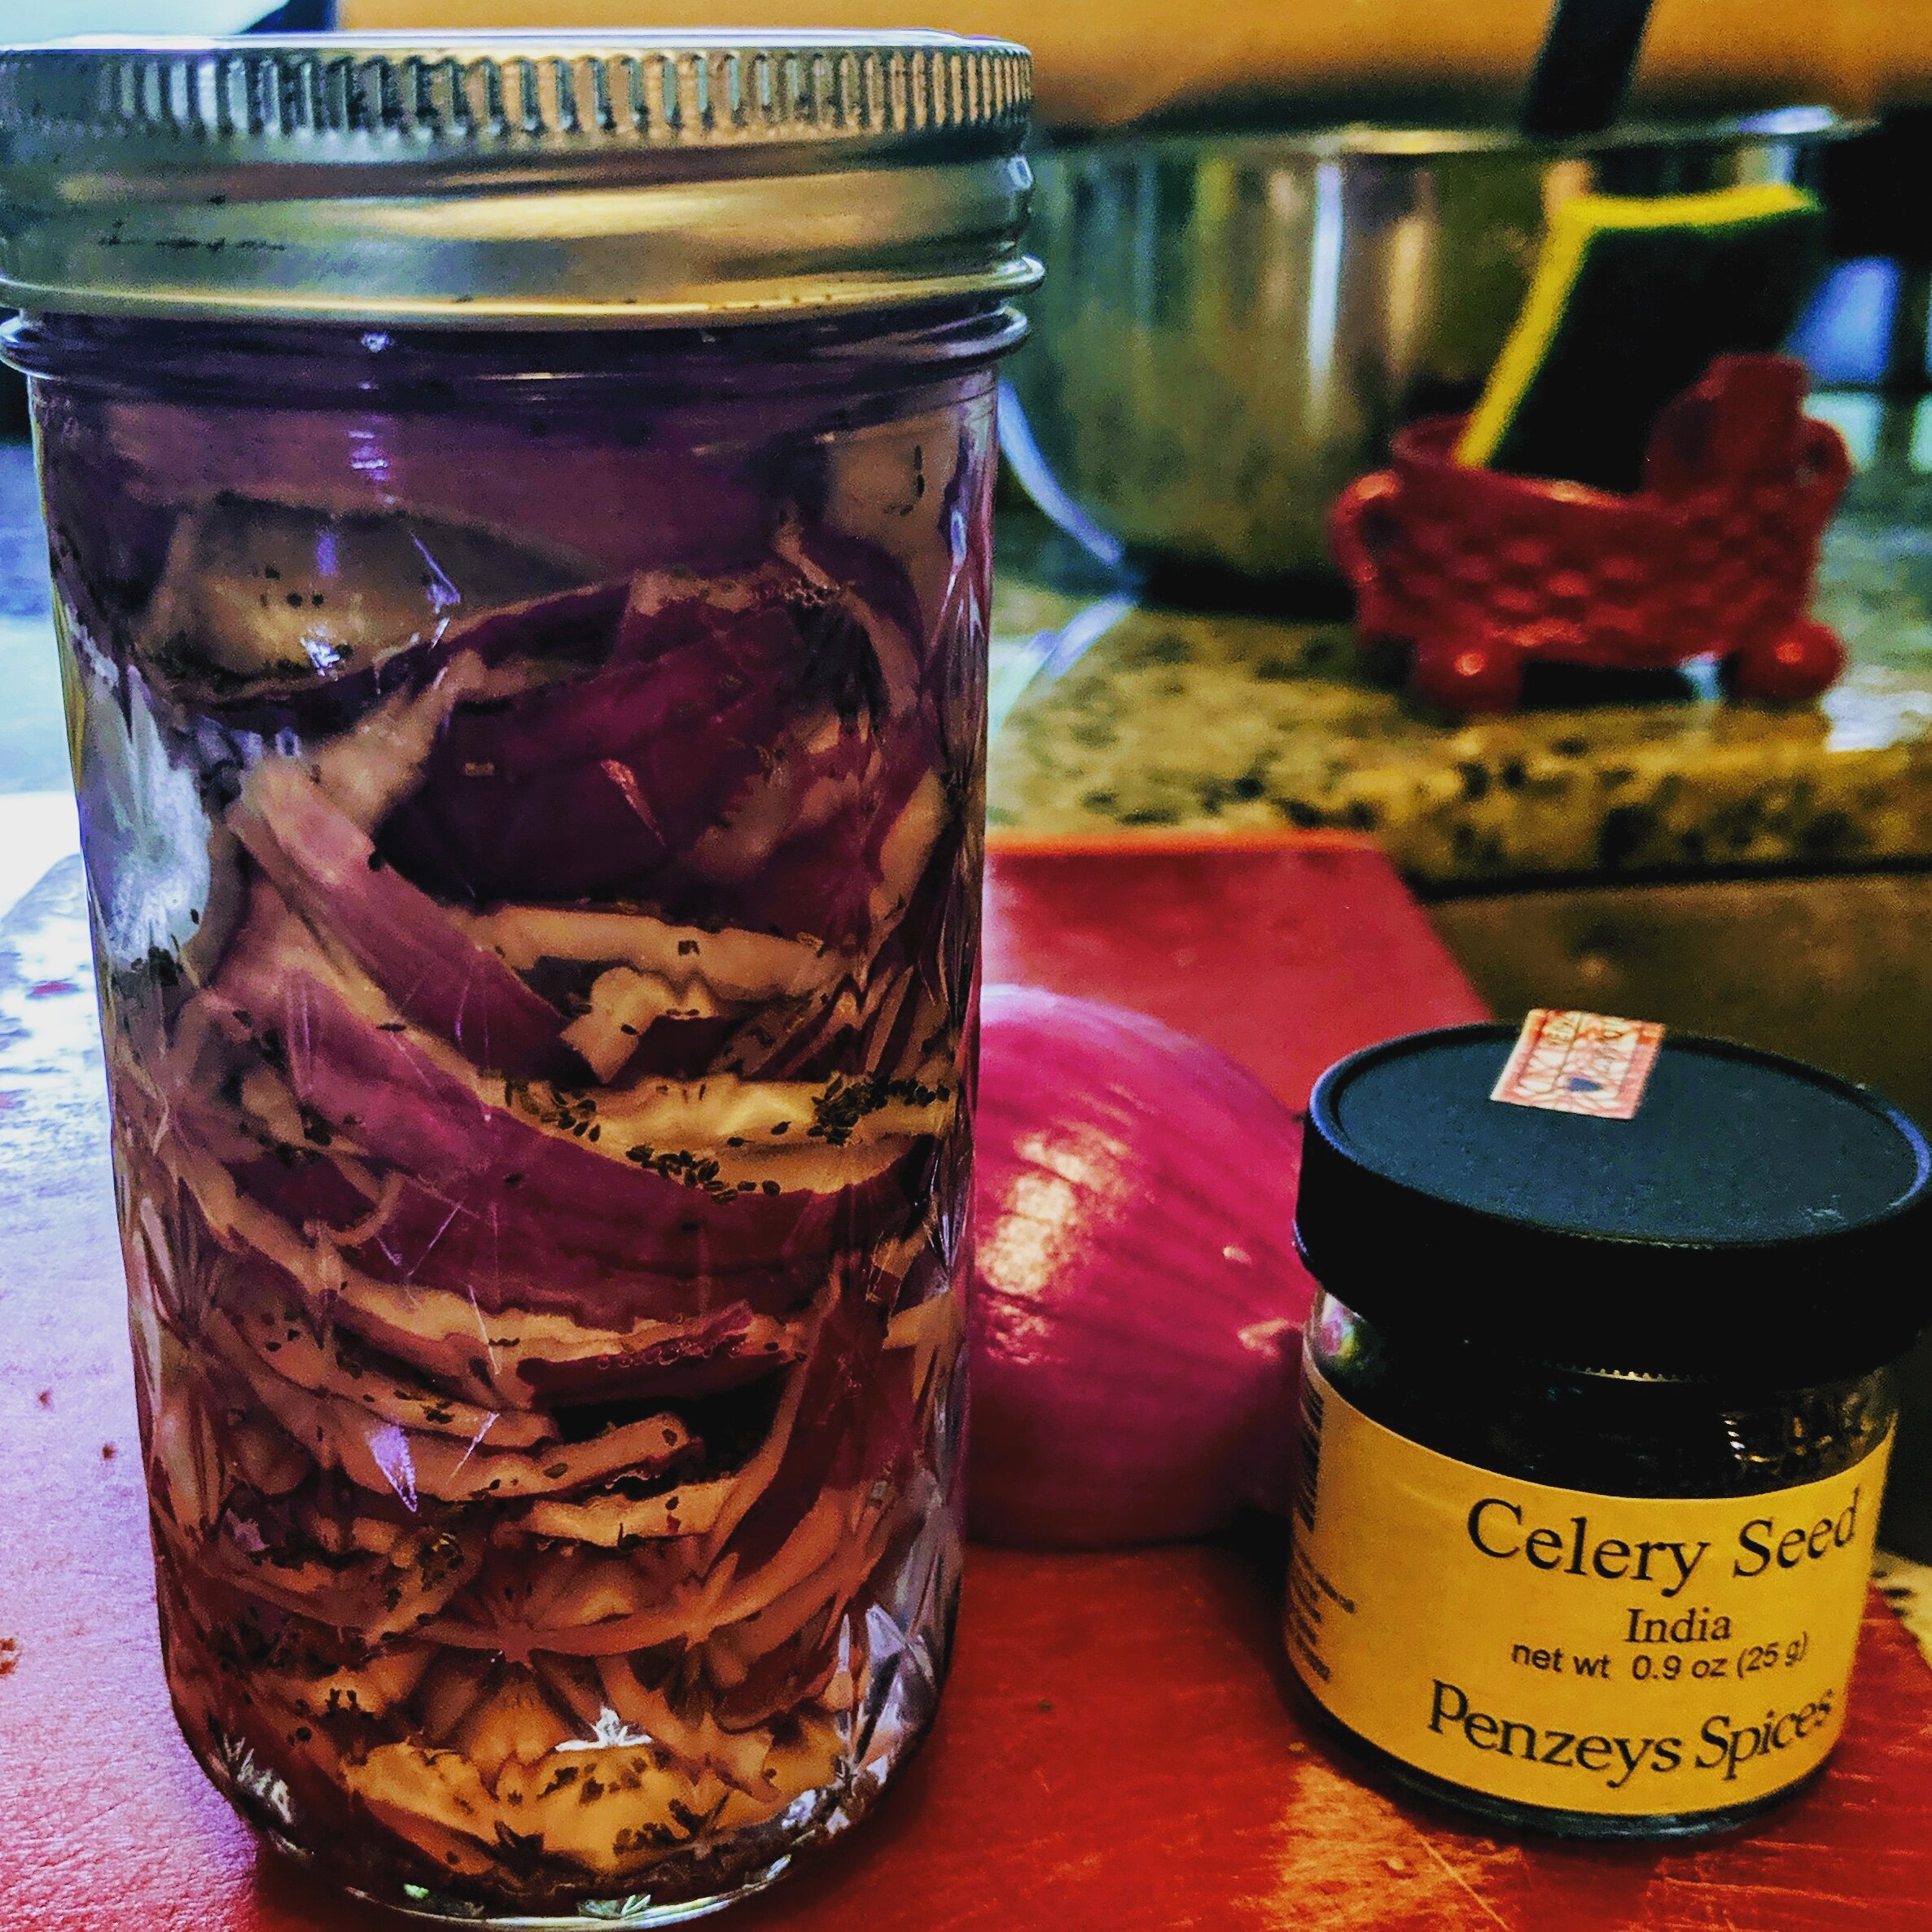
Time. Preparing a jar of pickles is relatively quick work. You may want to make a big batch as they’ll last for a long time in the refrigerator. Once you’ve mixed them up, it typically takes about two weeks for the pickling to do its magic. The exception being pickled onions which typically are ready within a few hours and only improve as they continue to pickle in the brine. Tip: See the Wandering Hearth no-cook pickled red onions recipe for the absolute easiest pickles ever.

The Essential of Brine
This makes enough for about a quart.
1 Cup Distilled White Vinegar
1 Cup water
1 TBS Kosher Salt
Dried Herbs: 1 Bay Leaf, 1 tsp mustard seeds, 1 tsp dill seeds -or- substitute 1 TBS pickling spice mix
Sweet Pickles: Add 1 TBS Sugar
Pour the vinegar, water, salt, and the dried herbs/spices you are using into a pot. Bring the brine to a boil and then turn down to low. Simmer for 10 minutes.

It is best to use a wide-mouth glass jar for simple pickles. Look for classic Mason jars with scre top lids or large jars with sealed hinge lids at your local hardware or cooking store.
The Method
Prepare the veggies. Rinse your veggies in cold water. Then cut into bite-sized coins, pieces or long spears. For cucumbers, you can leave on the stems if you prefer. For zucchini and beets you’ll likely want to trim off the ends.
Add veggies and add-ins to a glass jar. Fill a clean, glass jar with the veggies and add-ins. If using larger add-ins like sprigs of fresh herbs and peeled garlic, you may want to layer in the jar. Ideas for add-ins (proportions are per quart jar):
Fresh dill or oregano sprigs
Cinnamon stick
Dried chilies, broken into small pieces
1/2 tsp Dried Red Chili Flakes
1/2-1 tsp Celery Seeds
1/2 tsp Coriander Seeds
1/2 tsp Allspice Berries
1/2 tsp Fennel Seeds
2-5 Whole Cloves
1/2 tsp Turmeric (this will also turn your pickles a bright gold color)
1/2 tsp
Make the brine and cover the veggies. Make the brine following the method above. Pour over the veggies in the jars while still hot. If you run out, just whip up another batch (spices optional at this point) or partial batch and top up the jar(s). Seal each jar tightly.
Refrigerate and wait 2 weeks.
The pickles will last for a few months. Enjoy!

Homemade pickles are a simple, delicious way to preserve veggies and add depth of flavor to many dishes.
Want your pickles faster? Check out this no-cook Pickled Red Onion recipe that takes 2 minutes to make and only an hour to cure. See recipe.


